Wound drainage is not always a bad thing. Depending on the color and consistency of the exudate, the wound may be demonstrating routine healing or may be indicative or infection.
There are four main types of drainage:
Drainage
Color
Consistency
Definition
Infected?
Sanguineous
Bright red
Somewhat thick, syrup-like
Occurs during blood vessel development
No
Serous
Clear or slightly yellow
Thin, but slightly thicker than water
Contains sugars, white blood cells, and proteins for tissue healing
No
Seropurulent
Cloudy, yellow, tan
Varies from thin to somewhat thick
Beginning sign of infection / bacteria colonization
Yes
Purulent
Cloudy, milky, yellow, tan, grey, green, brown
Thick and milky
Pus, foul smell, and painful – indicative of possible infection
Yes
Note: Not all wounds follow these guidelines specifically. Any change in drainage color, odor, or sensitivity should be reported and discussed with your physician to determine possible signs of infection.
Ankle sprains occur when the ankle rolls, twists, or turns in an abnormal direction. They are often the result of decreased ankle strength and poor ankle stability. Ankle sprains often cause pain, swelling, and limited range of motion. They are typically classified into 3 major categories, which are broken down below.
Phase
Days Injured (estimated)
Treatment
Acute Phase (Protection Phase)
1 – 4 days
R.I.C.E. (Rest, Elevation, Ice, Compression)
Subacute Phase (Controlled Motion Phase)
5- 21 days
Gentle range of motion, light stretching, and very light strengthening
Chronic Phase (Return to Function Phase)
21+ days
Increased focus on strengthening, end range of motion, and progressing through return to activities/sports
Note: The severity of the ankle sprain and specific ligaments that are affected may alter the treatment process. Consult with your physician or physical therapist to develop the perfect plan to advance safely and effectively through your rehabilitation.
The temporomandibular joint (TMJ) is the joint that connects your jaw bone to your skull and is located directly in front of your ear. Pain in this region can be the result of postural deficits, stress, bad habits, and acute injury to the jaw. Symptoms are often recognized as pain with chewing, jaw stiffness/locking, and painful popping or clicking when opening/closing the jaw. In most cases, TMD resolves quickly and independently, but in other cases additional guidance is required to reduce pain and improve jaw function.
Helpful Hints to Relieve Jaw Pain:
Correct posture especially in unsupported seated positions.
Reduce stress levels.
Place your jaw in its resting position (Say “Emma” – this word in particular puts the jaw in a completely rested position.)
Use a warm compress on the joint to relax jaw muscles.
Limit bad habits – reduce clenching of the teeth, avoid biting your nails, and limit gum chewing.
Avoid overuse of the jaw – reduce intake of chewy foods, limit yelling and yawning.
If you continue to have pain, physical therapy helps to relieve discomfort by improving jaw alignment through manual work, modalities, and exercise.
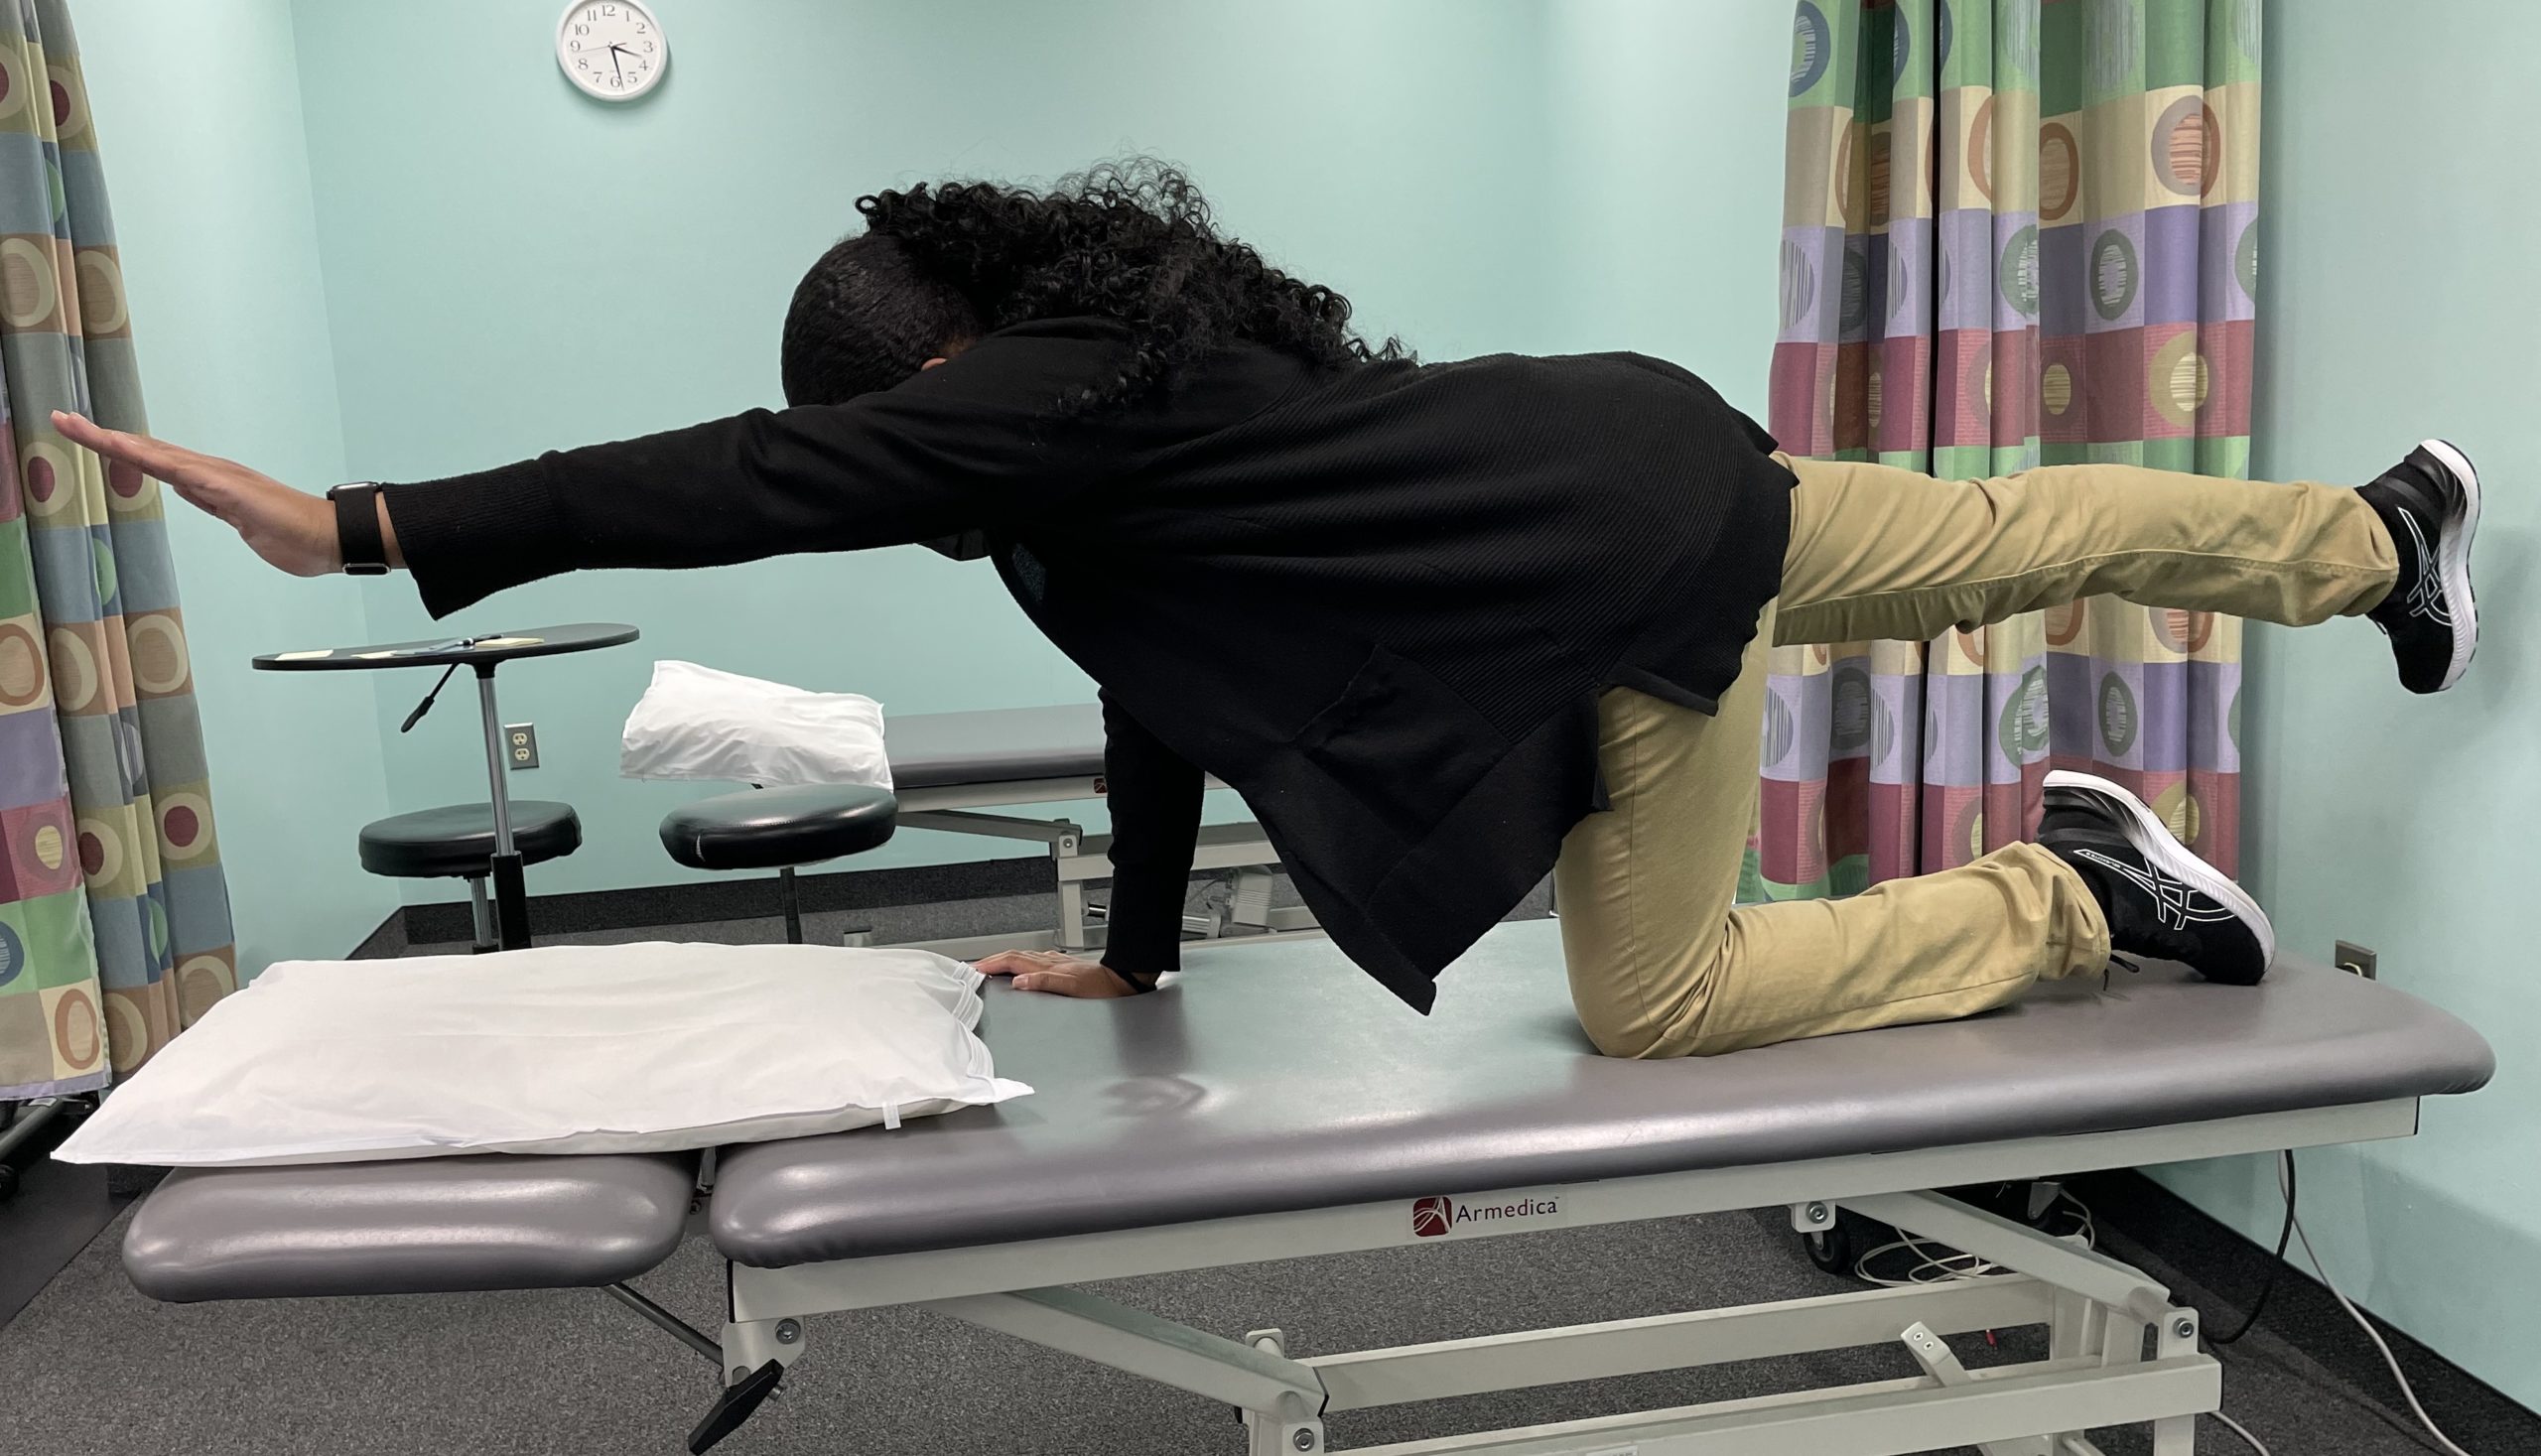
The bird dog is a simple exercise that enhances core strength, provides stability, aids in neutralizing spine position, and reduces the onset of low back pain.
The bird dog:
Improves spinal and core stability by stiffening the musculature and enhancing muscular endurance.
Improves hip extension by increasing glute strength and aids in differentiating low back extension and hip extension.
Improves shoulder stability by loading the joint with your body weight to help maintain stability throughout the exercise.
Improves balance and coordination by engaging in contralateral muscle movements while maintaining proper positioning.
If this exercise is too difficult to perform with contralateral movements – try performing one limb at a time until your balance and stability improves – progress as tolerated!
Aging is inevitable; losing your strength and ability to perform daily activities doesn’t have to be. Sarcopenia is a term used to describe the age-related progressive loss of muscle mass and strength. The process begins in your 40s and ramps-up between the ages of 65 and 80. While age-related strength loss is normal, sarcopenia speeds up the loss of muscle mass and can reduce your muscle mass by 8% each decade. Factors such as insulin resistance, obesity, loss of mobility, and inactivity contribute to the progressive loss of muscle mass in older adults and as a result increase the risk for falls and make daily activities difficult to perform.
Sarcopenia is often diagnosed with the following mnemonic:
S – strength (loss of strength)
A – assistive device (use of a device for walking)
R – rising from a chair (difficulty standing from a chair without use of hands)
C – climbing stairs (difficulty with stair climbing)
F – falls (presence of falls in the last year)
Aging might suddenly sound daunting, but it doesn’t have to be as long as you stay moving! Improving your strength and staying active reduces your risk at developing sarcopenia and also improves your quality of life. Strength training alone can improve your ability to complete daily activities, protect your joints from injuries, improve your balance, and reduce your risk for falls. It can also enhance your thinking skills, improve bone density (to reduce risk for osteoporosis), and help manage chronic conditions such as diabetes, heart disease, and depression.
Strength training as you age doesn’t have to be difficult. Research shows that exercising even just 2-3x per week can enhance muscle mass and strength. Ideally, 2-3 sets of 1-2 exercises for each major muscle group should be performed. If the “ideal” situation doesn’t exactly match your lifestyle, try starting small and just get moving! Any physical activity is better than no physical activity, because even small steps lead to big changes. Try walking more often, getting up out of your chair repetitively to build leg strength, lifting small weights, or joining a fitness class at your local facility; make the change to live a longer healthier life!
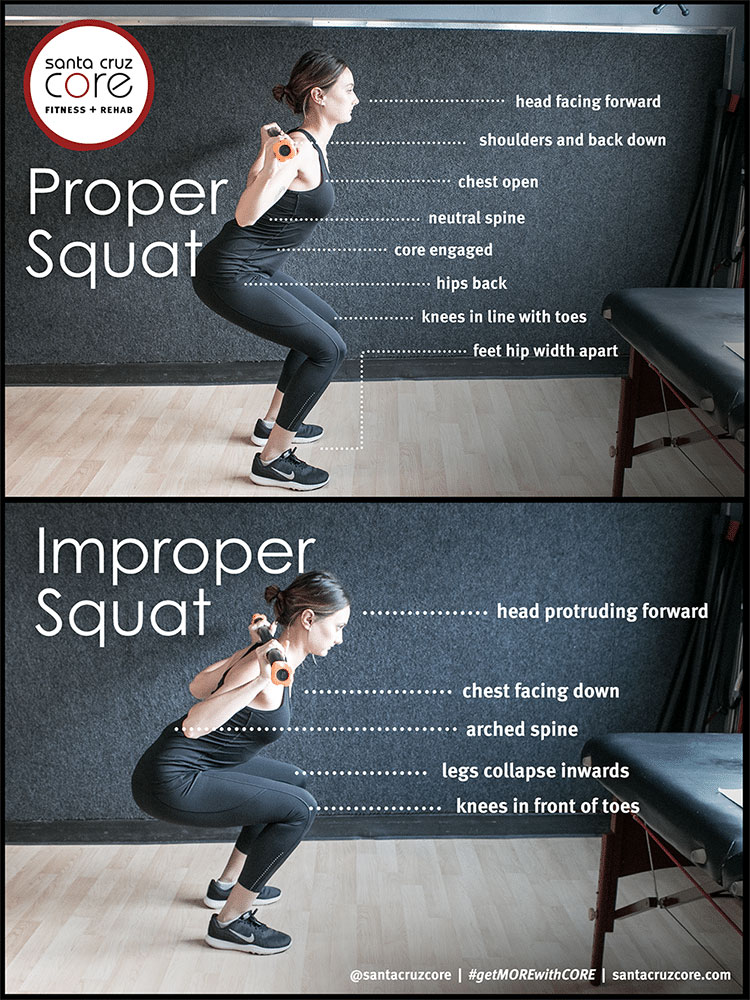
Squatting isn’t just for those really muscular people who put 700lbs on their back at the gym. In fact, I bet you don’t even realize how often you squat in a day. Think about the number of times you sit down on a chair and have to get back up, the number of times you go to the bathroom in a day, or even the amount of time you spend bending down to pick something up you might have dropped… This is constant, every-day squatting!
The squat is one of the most important exercises to perform for a wide variety of reasons. The squat aids in (1) increased leg strength, (2) increased core strength and lumbar stability, (3) increased hip and ankle mobility, (4) helps aid in the reduction of injury, and (5) increased metabolic rate due to muscle growth. Muscle loading the squat can be an effective way to increase muscle growth in the quadriceps, glutes, and hamstrings. Additionally, increased repetitions of squats with minimal muscle loading can enhance muscle endurance; this improves your ability to perform daily activities, increases athletic performance, and helps maintain improved posture/stability for extended periods of time.
Should I squat below 90?
Squatting below parallel does not increase your risk for knee injuries, however, it does often increase your risk for breaking proper squat form/mechanics. Squatting below parallel does not provide any significant muscle activation benefits, but can enhance mobility. Studies show minimal differences between squatting to 90 and squatting below 90. Most importantly, maintain good form and mechanics before progressing the depth of your squat – this will enhance overall benefits.
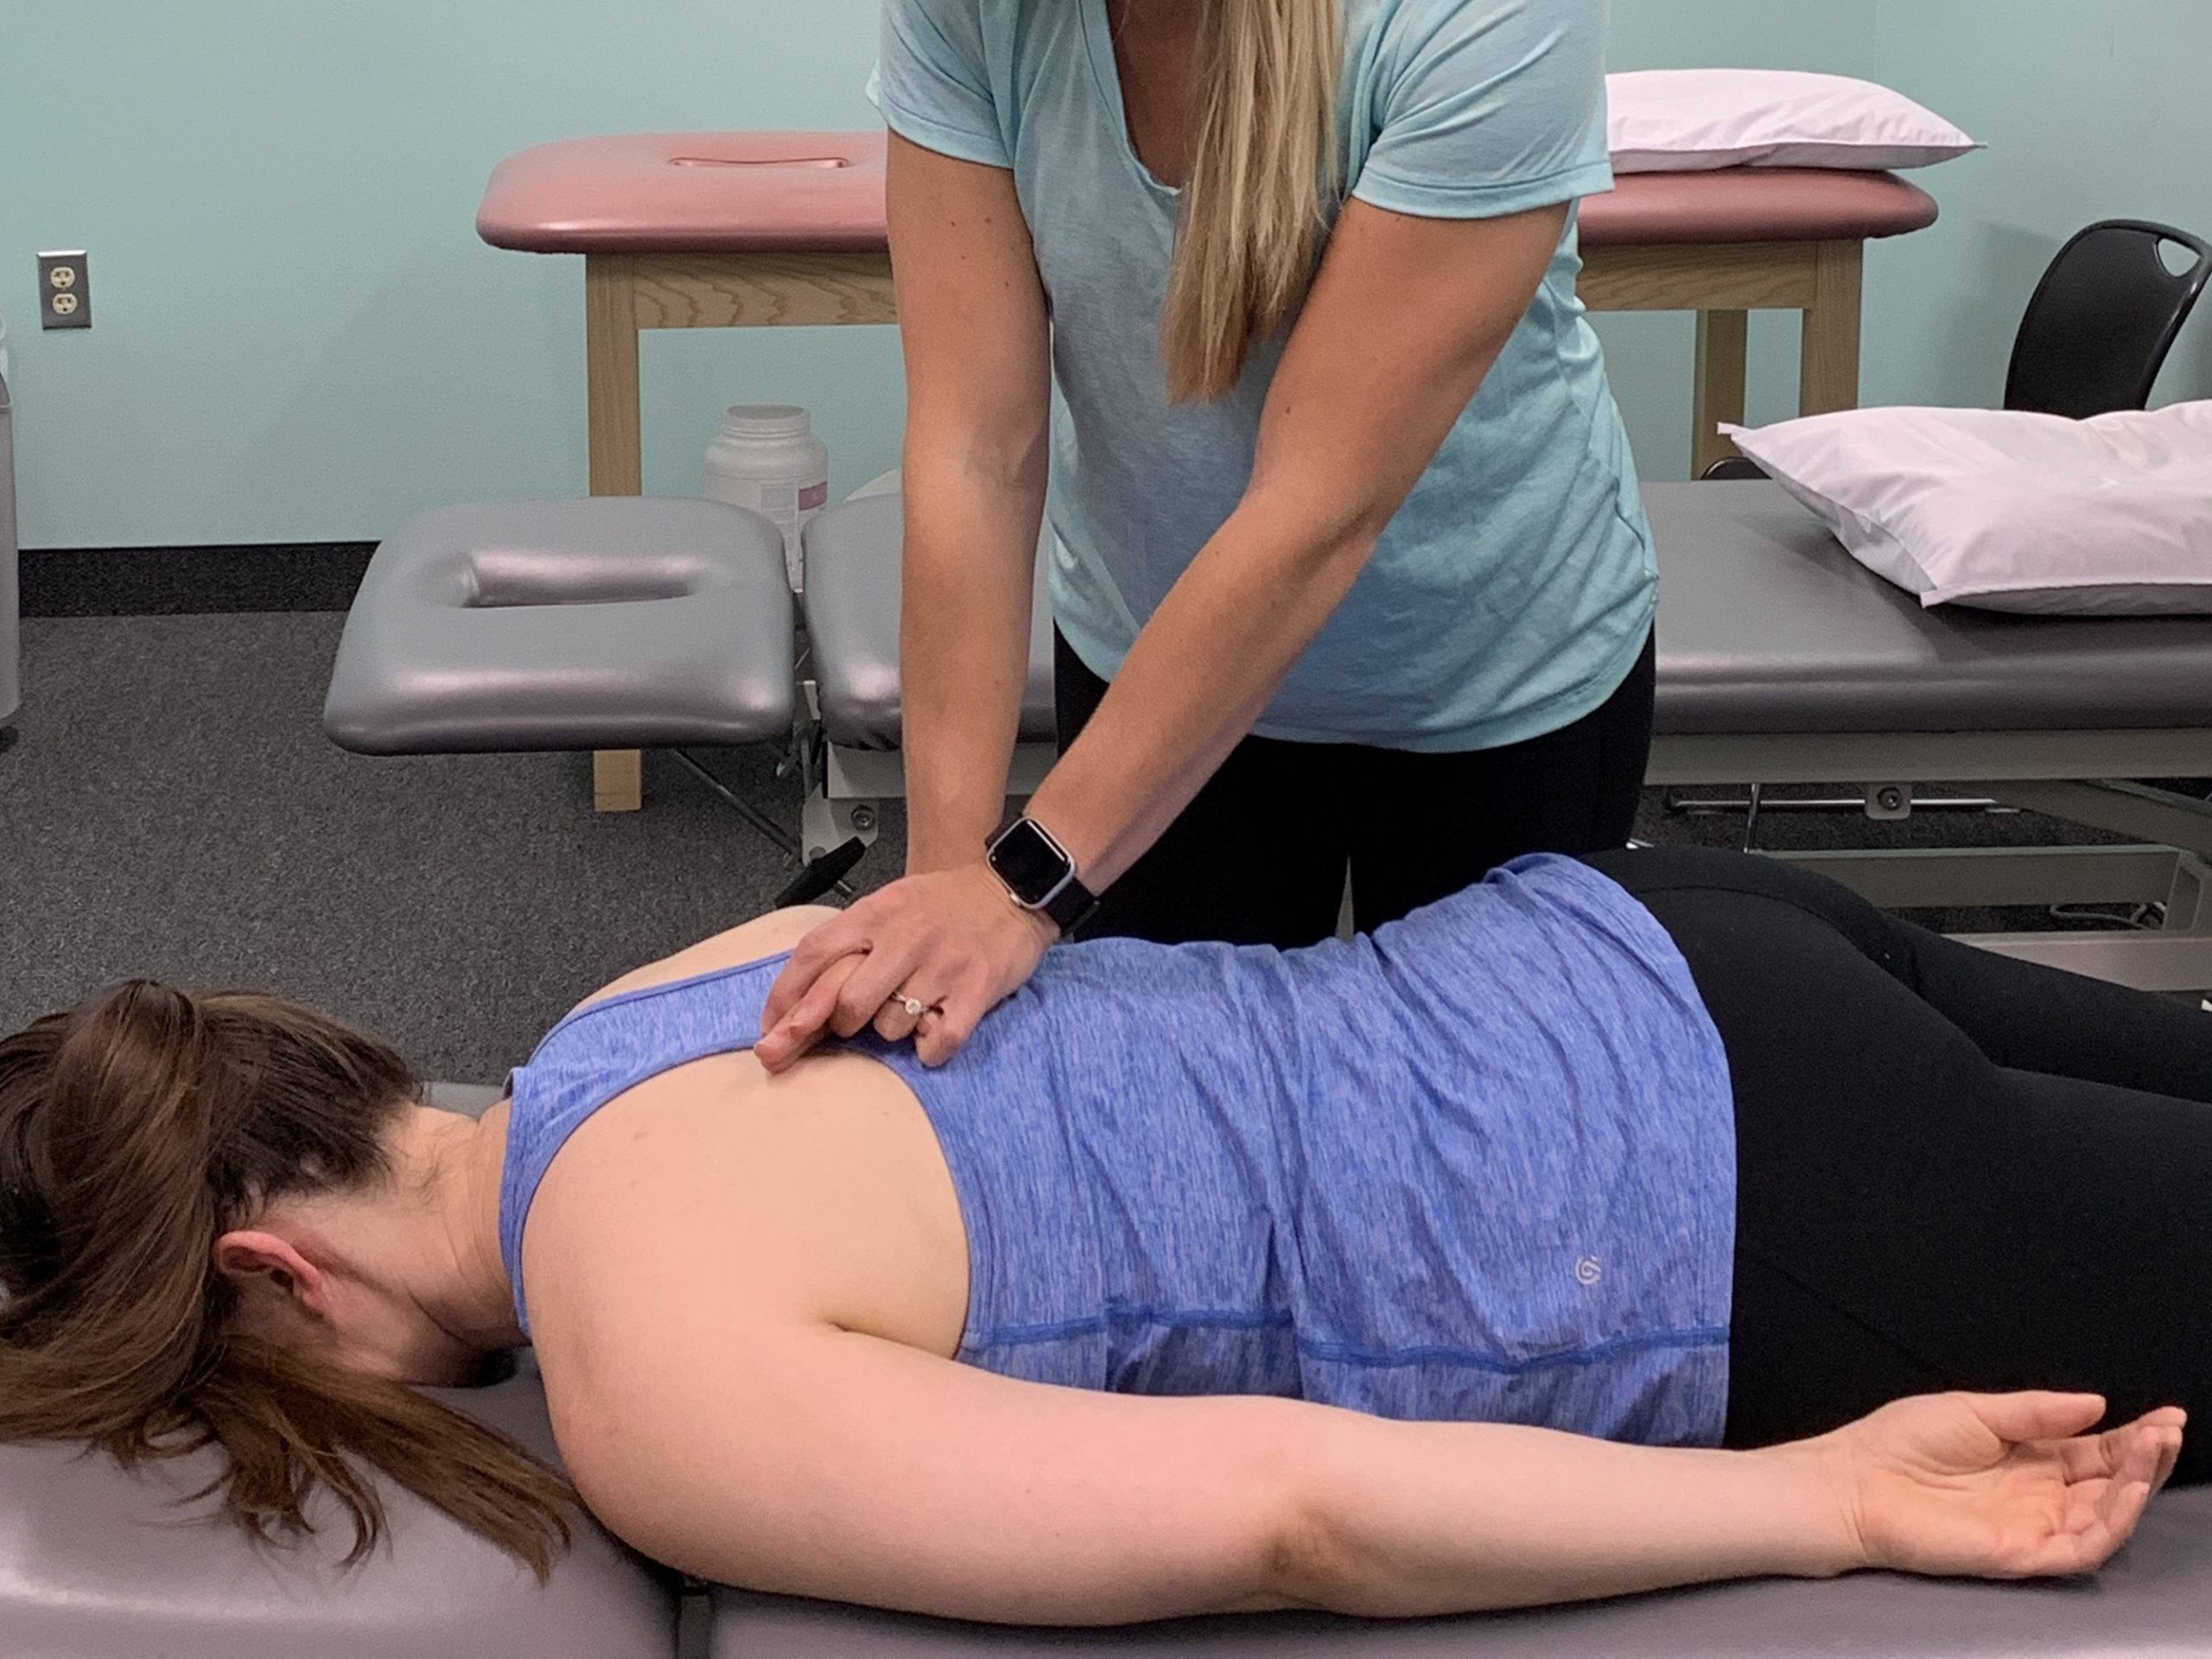
In the early centuries, a corset was typically worn as a supportive undergarment that improved posture, supported the spine, and shaped the body into what was then called “ideal proportions.” While corsets used to come in many shapes, sizes, and colors – in today’s world the most important “corset” goes by a single name – the Transverse Abdominis (TrA).
The TrA is the deepest of the abdominal muscles and acts a girdle around the spine. The TrA responds most to perturbational movement and is the only abdominal muscle that remains activated with resisted extension in the spine (resisted extension often comes with exercises such as lifting a box incorrectly, deadlifts, and a quick jerking motion backwards). The TrA is the first stabilizer that kicks in with any arm/leg movements, and as a result helps limit your risk for injuries. It also aids in stabilizing each bone in your spine; so without this muscle, your spine would just be dancing around, pinching on nerves, and collapsing (almost).
The take home here is… the TrA is very important! You need this muscle to assist in stabilizing the spine and when it doesn’t do its job… you end up with back pain. The TrA is difficult to control. It doesn’t work like the 6-pack abs you’re used to. Try activating your TrA to reduce your risk of low back pain, improve your core and back stabilization, and reduce your risk for injury.
If you are experiencing an ache or pain that is persistent, you want to see a medical professional to determine your treatment plan. In the state of Maryland, you can see a physical therapist without seeing a physician first. If you choose to do this, a physical therapist will perform an evaluation to determine your plan of care. If a physical therapist feels seeing a physician is necessary based on your evaluation, it will be recommended. This is the same for an MRI. If you see a physical therapist first, we are unable to prescribe imaging but we will recommend you see a physician to ultimately get imaging. Most people go through a round of conservative treatment, such as physical therapy prior to receiving an MRI. An MRI is recommended when physical therapy is not improving symptoms or you are hitting a plateau with improvement. Most insurance companies will not approve paying for an MRI without the patient having physical therapy first. If you are unsure of what you need to do for the next step in your treatment plan, make sure to make an appointment with a physician or physical therapists to help guide you.
Many patients come to physical therapy with back pain. They come in asking the question, “why does my back hurt?” Well, the answer is not the same for everyone. A physical therapist has to perform a thorough evaluation to determine the cause of the patient’s back pain. The evaluation consists of finding out specific details from the patient about their back pain. This leads the therapist into a specific evaluation of the patient’s range of motion, strength, flexibility, and stability. Typically back pain comes from a lack of mobility, strength, and flexibility. For some patients, it is more of a decrease in flexibility, for others because of strength deficits, and some folks it is a combination of both. Once this is determined, your therapist will develop a plan of care to improve upon the deficits found during your evaluation. On average, it takes 4-6 weeks of consistent physical therapy to achieve the ultimate goal of decreased pain and improved function. The key as a patient is to be patient and stick with the plan. If after a month of physical therapy you do not notice any improvements, make sure to speak with your physical therapist to determine the appropriate continued treatment plan.
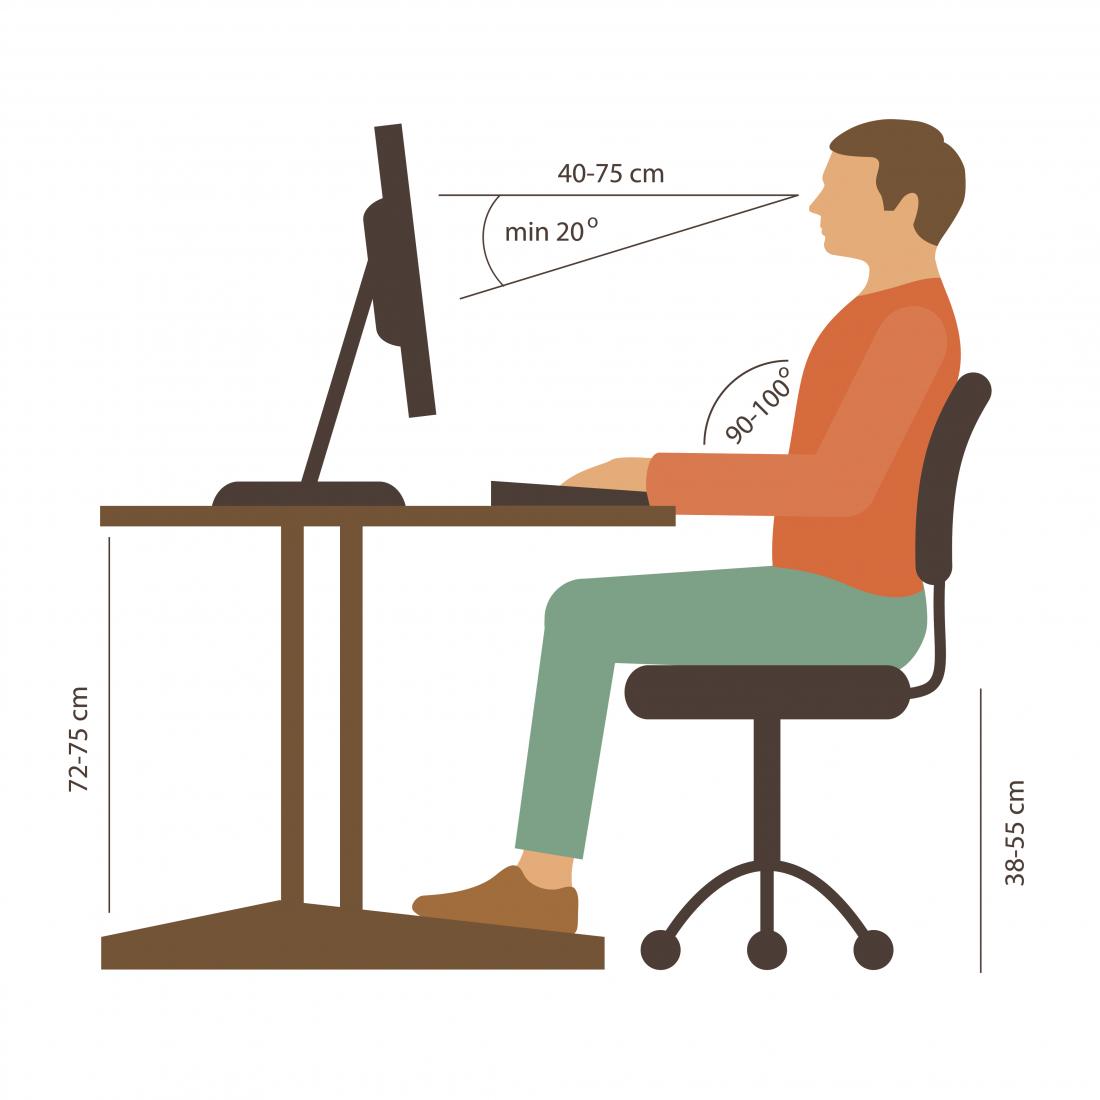
If you find yourself working from home more than you normally would, you should consider these tips to avoid an onset of neck, back, or wrist pain.
Choose the correct workspace – Avoid sitting on a sofa or bed while getting your work done. Instead, you should find a chair that has good low back support and a table or desk that you can place your laptop on.
Maintain correct posture
Try to sit with your feet flat on the floor instead of letting them dangle.
Place your laptop so that the top of the screen is at eye level to avoid straining your neck.
Try to avoid slouching over the computer by keeping your shoulders pinched back as you work or using your chair’s back support.
Your forearms should be able to rest lightly on your armrests and desk and your wrists should stay in a neutral position.
Take frequent breaks – Stand up and walk around for a few minutes at least once an hour at a minimum. If you can avoid staying in one position for too long, it can help to decrease any stiffness you may feel throughout the day.